All-Army CyberStakes 4 - Cryptography (Speak Plainly)
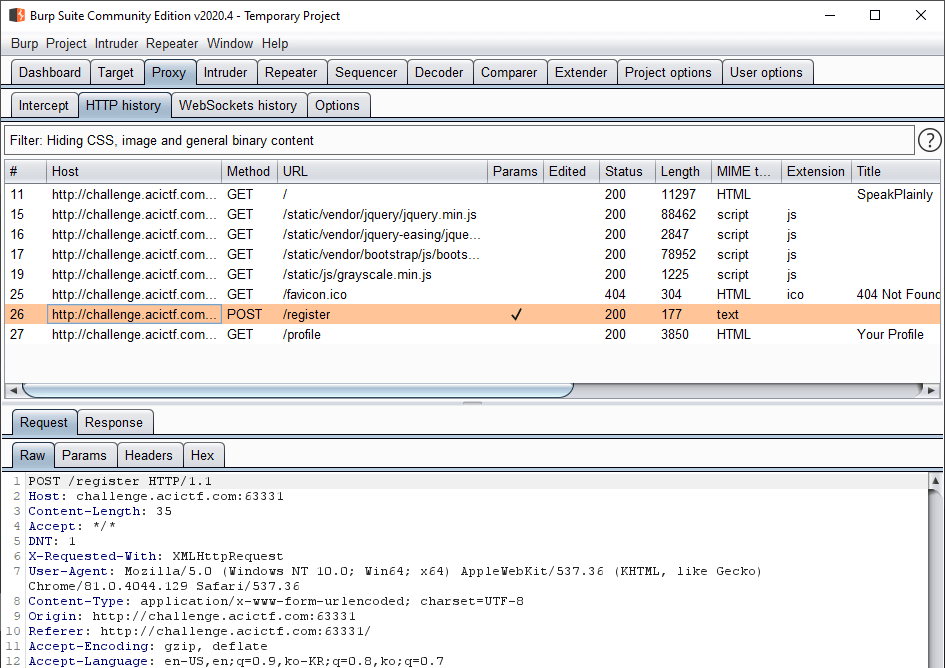
This problem diverts from the previous ones by providing us with a website instead. The hints bring a lot of attention to the website’s login cookies, so we try creating an account and examining the created cookies. auth_token in particular stands out since it’s not a standard cookie that’s seen on other sites.


After creating an account, the website tells us it’ll give us the flag after we provide it with the StrongToken. The home page has several information blocks that give us a few hints about what this could mean:

-
auth_tokenis encrypted with a 128-bit key in AES-ECB mode. -
Prior to encryption, the site appends a StrongToken to the data and then encrypts it.
Since the site is using Electronic Code Book (ECB) mode, we can perform a chosen-plaintext attack by using the account creation process as an encryption oracle. This will allows us to extract the StrongToken, byte-by-byte. The entire attack process is well-explained in a blog post by Zach Grace.
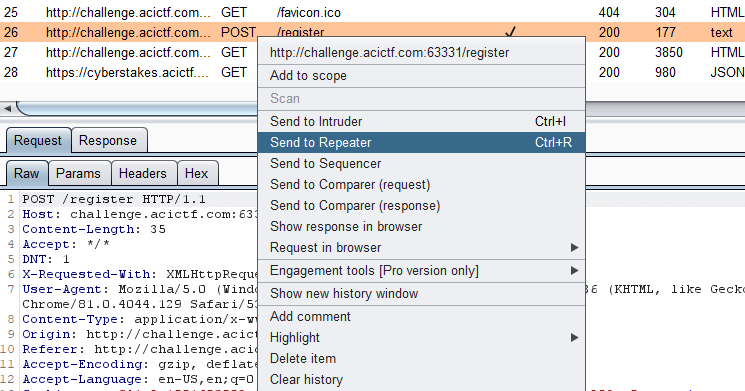
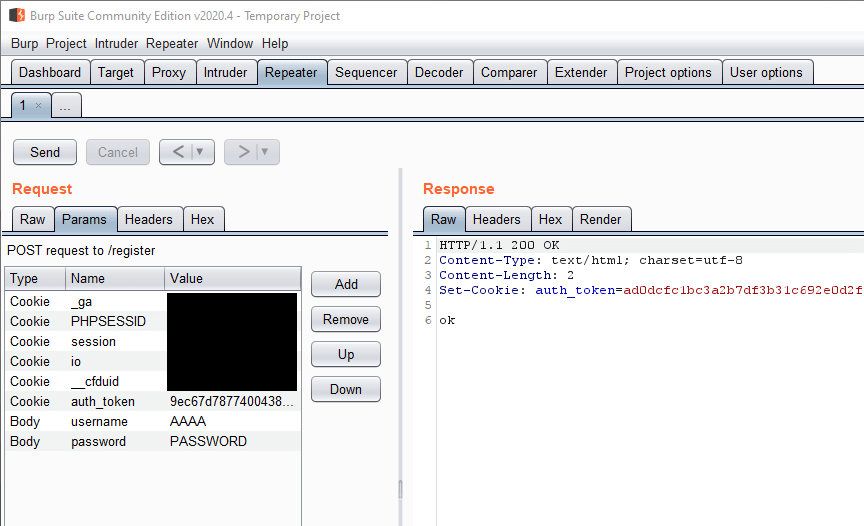
Since we’re going to be using the account creation feature quite a bit, we should figure out a way to make the process easier for us. Burp Suite has a feature called Repeater that allows us to save a web request and repeatedly modify and resend it, rather than repeating the process in the web browser.


auth_token change in the response.
Our first step is to figure out exactly what’s being encrypted. We know it comes from the account information, so there’s only two real options: the username and password. By testing out two accounts with the same username but different passwords, we can see that auth_token doesn’t change as long as the username stays the same. With this, we can determine that auth_token only uses the username in its encryption.
testusername:password = 958af5df8adcc6bb0abf0473f6be9bb7684387617f292c4d7e1f689f7f5bf19d
testusername:newpass  = 958af5df8adcc6bb0abf0473f6be9bb7684387617f292c4d7e1f689f7f5bf19d
The next step is to determine the encryption block size. By testing out a few different inputs, we can quickly see that ciphertext is added in 16 byte blocks.
AAAAAAAAAAAAAAA  (15 As) = a764ad6331f1ed698044b8f4bf208dd7 73ad7e84d6e3bb6e8c85112732e0160a
AAAAAAAAAAAAAAAA (16 As) = e5a8d39cc17dd336ac0c0fd443ca5089 23101bd6e92b9703b48b69d5a1d01460 68a9e1b3e5368dc2725eb057cc397065
Our next step is to figure out the offset between the start of the encrypted data, and where our input begins. We start by sending 2 blocks (32 bytes) of the same information, and then prepending that input with padding characters until we can see two blocks in a row of the same encrypted data. It will also let us estimate the size of the StrongToken by seeing how much many more blocks appear after the matching blocks.
AAAAAAAAAAAAAAAA AAAAAAAAAAAAAAAA = e5a8d39cc17dd336ac0c0fd443ca5089 e5a8d39cc17dd336ac0c0fd443ca5089 23101bd6e92b9703b48b69d5a1d01460 68a9e1b3e5368dc2725eb057cc397065
[None]                   = 23101bd6e92b9703b48b69d5a1d01460 68a9e1b3e5368dc2725eb057cc397065
These results immediately show that there is no offset between the start of the plaintext and the username, since the first two blocks are already the same without any padding needed. Now that we know the block size and offset, we can begin brute-forcing the StrongToken. We first provide an input one byte smaller than the block size, AAAAAAAAAAAAAAA. This creates a ciphertext block using the plaintext AAAAAAAAAAAAAAA?, where ? is the first byte of the StrongToken. Using the ciphertext block provided by the website as a reference output, we can brute-force the first byte of the StrongToken. By using the reference input, AAAAAAAAAAAAAAA, and iterating through all possible characters for the last byte, we can determine what the StrongToken’s first byte when our output matches the reference output.
Reference Value:
AAAAAAAAAAAAAAA  = a764ad6331f1ed698044b8f4bf208dd7

Brute-Forcing:
AAAAAAAAAAAAAAA! = d4e420b6abd4e19033ed1fdea60dabdb
AAAAAAAAAAAAAAA" = caee4360f81620169c15d01da4064629
[...snip...]
AAAAAAAAAAAAAAA: = 0c775d6e025a1ad985ac8c339e261a47
AAAAAAAAAAAAAAA; = a764ad6331f1ed698044b8f4bf208dd7
** MATCH **
By repeating this process and replacing more of the reference input with discovered StrongToken characters, we can slowly determine the StrongToken byte-by-byte. Using a Python script also makes this process less arduous. With this process, we are able to determine that the full StrongToken is fY5V/=B80?e4.CA8. (The initial character ; is only used as a divider between the plaintext and the StrongToken) By submitting the token to the website, we are able to receive the flag.
Correct! The Flag is: ACI{c0db96acd85091480db76ed49ca}